Aerial photography and videography by Outdoor Video & Photographic

P4 Pro Shooting Aerial Footage for OV&P

How Do We Do It?

Here at Outdoor Video & Photographic, we’re privileged to have long-standing relationships with some of the finest corporates and property developers in South Africa. What’s really cool is how much we’ve learnt over the past 18 years that has enabled us to improve and refine our techniques and technology so that our clients are always excited about the work we produce for them.

A big game changer over the last 10 years has been the advent and exponential growth of what is known as image stabilisation, which is achieved through powerful technology being built into hand-held filming platforms such as the DJI Ronin. Even more amazing is the use of similar technology in remotely controlled quadcopters known as DRONES, like the P4 Pro pictured above.

When we create a video or short film there are a multitude of factors that come into play which, if not choreographed and planned effectively, can result in lost time, money and more importantly, one’s reputation in the videography industry. Ground based filming, usually done with gimbals or tripods, as our good friend and freelance cameraman Chris Duys demonstrates below, is the foundation of most filming projects, but being able to add a whole new dimension (literally) to the storyline has upped the ante bigtime.

Chris Duys Shooting Video for OV&P

This is where aerial drones and hand-held gimbals come into their own. The technology used in drones has enabled manufacturers to shrink the size, reduce the originally exorbitant price dramatically and exponentially increase the functionality and quality of these amazing pieces of engineering art, to the point that if you don’t take advantage of them you’re going to get left behind in terms of missing the opportunity to exploit the potential power of your online and traditional marketing efforts.

The silver bullet is the incredible level of stability one can achieve using these three axis gimbals with the latest tech stabilising the image irrespective of the wind buffeting the drone every which way or the jarring that is almost impossible to obviate when walking, running or jumping around with a hand-held camera that is not stabilised.

In the past filmmakers have used huge pivoting structures called jibs to track moving objects on the ground and they’ve had to use expensive helicopters for aerial shots with expensive gimbal systems to stabilise the video and stills footage. All of this new, amazing tech is particularly effective when combined with other elements to achieve the desired look and feel for each production.
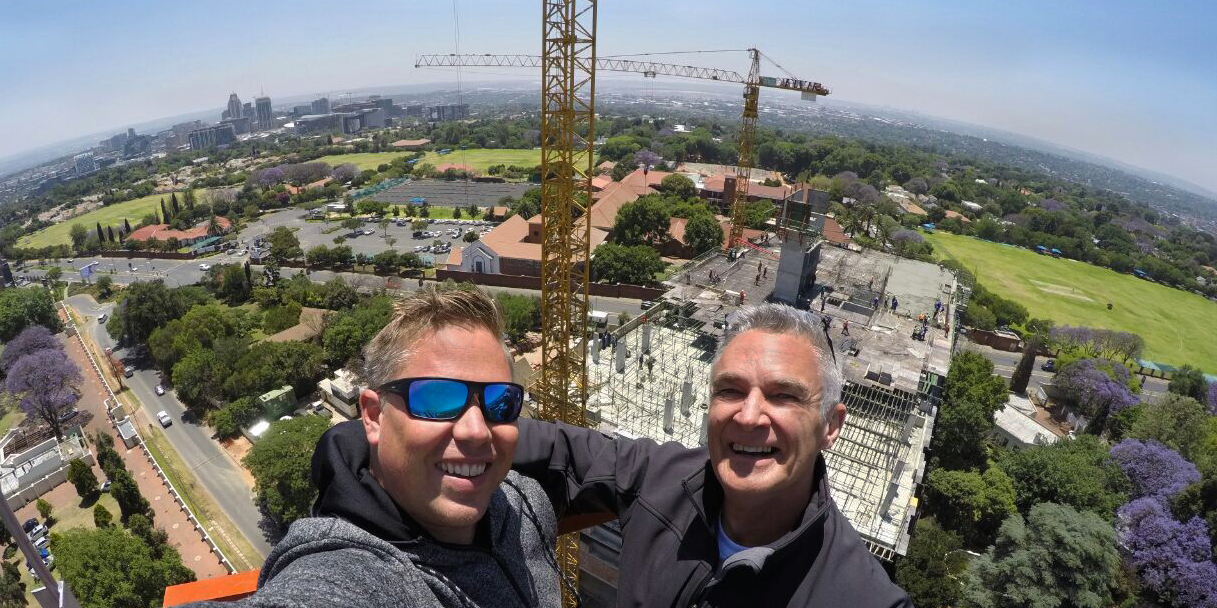
Chris Duys & Dave Estment of OV&P

On the technical side, this involves combining elements such as ground based tripod footage and ground based gimbal footage with stabilised aerial footage (the new dimension), as well as time-lapse footage where applicable. This is created from multiple interval images such as Chris and I were setting up here to capture construction in progress. Some other key elements that come into play are creative aspects like shallow depth of field, focus pulling, lighting, audio and slow/fast motion effects, colour grading, etc.

Using one element on its own is limiting and far less compelling than leveraging our creative and technical talents to merge all of the options available, be it to create content for construction, corporate, wildlife, commercial or any other visual tool intended to enhance credibility, highlight differentiators and showcase value systems on behalf of any business out there.

I hope this brief explanation of how we do it and what tech we use sheds some light on the complexity of options available to our videographers in their quest for excellence. If you have any questions, you’re welcome to post a comment below. We’re happy to chat!

Aerial Image of Sandton by Dave Estment of OV&P

Night Photography – Not Always Easy

We’re often asked to do low-light or night photography, either in the bush, close to nature and the stars, or when our property development clients want to showcase their architectural creations, for example. The images above and below are classic examples of low-light photography, the first using a 3 Axis gimbal to stabilise the camera on an aerial drone and the second using a tripod.

The first thing that tends to pop into people’s minds when talking about night or low-light photography is that it’s difficult because the shutter speed, aperture and ISO settings are dramatically compromised due to the reduced available light. This can easily result in blurred images because of camera shake and not having enough shutter speed. In some ways they’re right, because it doesn’t matter how technically correct the image may be – if it’s blurred, it’s useless. Period.

Key Camera Settings

So, how do we produce perfectly exposed, pin-sharp images in near darkness? First, we need to stabilise the camera so that it stays rock steady while the shutter is open, sometimes for up to 30 seconds or longer. One of my golden rules when doing low-light photography is to use the lowest possible ISO setting, as this will minimise the graininess of the image. So if your camera has a low ISO setting of 100 and a high ISO setting of say 6400, ALWAYS choose 100 as your default when possible.

The second factor to consider is the depth of field you want to achieve in the shot. The larger the aperture, the shallower the depth of field, but the more light is allowed onto the sensor. What if you want a deeper depth of field where everything appears to be in focus? Simple. Use the aperture setting that will give you the depth of field you require. Then let the last setting that you need to consider compensate for the lack of available light, while ensuring correct exposure and depth of field. What’s this last setting? Shutter speed!

The Game Changer

Once you have stabilised the camera on a tripod or a three-axis gimbal in the case of a drone, you’re free to use the slowest necessary shutter speed to control how much light is allowed to reach the sensor. Stabilisation is the game changer. In general, it’s the answer to the problem, but there is another factor that creeps into the equation. What if you have areas of the image that are brighter than other areas, like a brightly lit lounge or bedroom in a house that is otherwise pretty dark by comparison?

Night Photography of Home by Dave Estment of OV&P

The Golden Rule

The golden rule here is to expose correctly for the brighter areas, because if you overexpose these, you will completely “blow” them, leaving no information there to “pull back” in post production. When you correctly expose the brighter areas of the image, which will in turn underexpose the darker areas, there is still a much better chance of brightening the darker areas in post production (since these tend to contain more information), provided they are not completely black.

The Next Level

It helps to use artificial light like a speed-light or studio lights to balance the available light in the darker areas of the image. This is where it can get tricky, and it’s probably a good idea to call in a pro in situations like this 🙂 The same principles apply whether you’re in the bush or in the “Big Smoke”. It does take more planning and time to execute a correctly exposed, pin-sharp low–light photograph, but if you use these guidelines, I’m sure you’ll be thrilled with the results.

Please feel free to contact us for your low-light projects and any other video and photographic requirements that may call for more experience. In the meantime, SHOOT SHARP.

Aerial Photograph of Construction in Progress

Time Lapse – It’s Just A Mystery

Time lapse photography is a genre of video work that uses still images shot at pre-determined intervals to create the illusion of a high speed ‘time warp’ for the viewer. It’s a popular method for creating another perspective on the progress or timeline of a project, event or natural scenario. Imagine shooting the night sky by depicting the stars and satellites appearing to scribe perfect arcs in the sky as the earth rotates, or creating a video to illustrate the progress of a skyscraper, where the building appears to go from its foundations to completion in just 90 seconds, with tiny people scurrying around at warp speed like ants building a nest!

We at OV&P have created a variety of time lapse sequences ranging from the erection of a record 13,000+ sq.m of Nomadik tents that seemed to pop up from nowhere in preparation for the epic annual 702 Walk the Talk event at Marks Park in Johannesburg, to a 19 month time lapse project of a 15 story building being constructed in the Sandton CBD – changing the suburban landscape forever to match the frenetic business transactions also happening at warp speed in the prime office space of the financial capital of Africa.

The variety of applications for time lapse video is unlimited, but we prefer to focus primarily on specific industries in order to specialize and serve our clients best by developing techniques and processes that give them the edge in their marketing. We often combine different elements of video into a project because we find that the more interesting we can make it, the more engaged the audience is, and the more success our clients enjoy. Below is a sample of the collaboration between Action Gear and OV&P in creating lasting relationships with developers like FWJK, whose 3 month progress on their Illovo construction project is depicted in the video:

Using a property construction project as a time lapse example, we utilize traditional ground based video to capture the close-up and panning shots required to emphasize the quality and attention to detail that’s so important to investors who demand the best bang for buck. We then add exciting high level aerial footage shot from our hi-tech drones. As a SACAA registered and qualified pilot, I use different techniques to fly through, circle upwards and away from the site and to get really creative shots not possible before the advent of drones. During all of this, there are strategically placed time lapse rigs quietly doing their jobs, perfectly positioned to capture the required compositions in order to illustrate the magical way that the building grows from day to day.

We highlight important stages of construction by using shorter intervals between shots to feature more detail for viewers, and then contrast this with the warp speed illusion which is so dramatic. We feel that using multiple disciplines to convey the story creates the most compelling end result, ultimately ensuring that we exceed our clients expectations and maintain a competitive edge in the market place by utilising the best gear, the best people and the best techniques available to ‘get the shot’. When we at OV&P call it a ‘wrap’, we go home and sleep well knowing that we went the extra mile to secure a win-win for all concerned.